Profile
your printer
Module
Objective: At completion of this module you will be able
to profile
a printer utilizing given hardware and software tools.
We have already
covered monitors and scanners and although they are extremely important
to our workflow, the final destination for most image files will
most likely be ink on paper (print). Even though our monitor is
calibrated/profiled
along with our scanner if the printing process is not controlled
or understood you are most likely going to be very disappointed
with the results.
As we discussed
in Part I of this tutorial a profile describes the characteristics
of our device. Ideally we would like this profile to be as accurate
and precise as possible, because we want to match what we see on
our monitor to our output device, at least as close as we can get
it. In fact if your color devices have been properly calibrated
and profiled to this point your final output should come very close
to matching your original digital camera file or scanned negative/print.
Many printer and paper manufacturers have created and freely distribute
"canned" or generic profiles
for specific printer, ink and paper combinations. These profiles
are often used with fairly good results, some users however discover
that they are not good enough. There is a plethora of software
applications and hardware devices that can be used to create
custom profiles. A custom profile is created with
your specific printer, ink and paper combination for ultimate precision
and accuracy. This module will walk you through the process of creating
a custom printer profile.
Tools:
- Apple
G4 Computer OS 10.2.6
- GretagMacbeth
Eye-One Spectrophotometer
- Eye-One
Match software
- Epson
Stylus Photo 2200 Printer
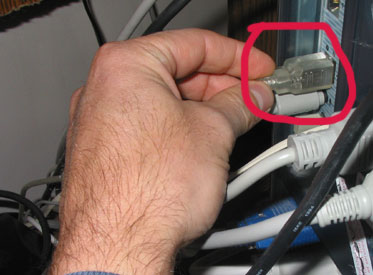
Step
1:
Attach Eye-One spectrophotometer
to your computer if you have not already done so.
Please
note that this device needs more power than can be delivered
from a keyboard USB connector. You will most likely need to
connect the Eye-One directly to your computer.
|
|
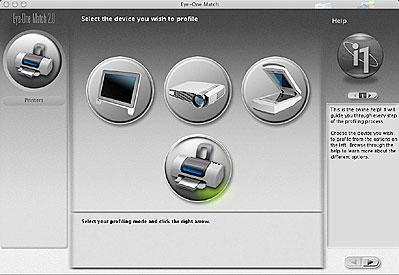
Step
2:
Open calibration/profiling (Eye-One Match) software
Select
Printer as the device to be calibrated/profiled.
|
|
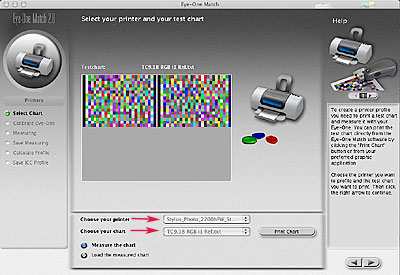
Step
3: Select
your printer and test chart.
In this
case we have selected the Epson 2200 (Ink Jet Printer) and
an RGB target with 918 color patches. Even though the Epson
printer uses CMYK inks it is best to treat it as an RGB device
for profiling. The larger target (918 patches) allows for
a more accurate profile.
At this
time you will also click on the Print Chart
button. This will take you directly to your printer dialog
box.
|
|
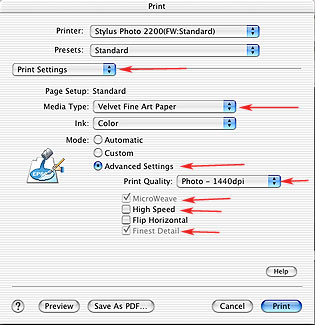
Step
4: Printer
settings...
From
the pull down menu on the left select Print Settings.
Select the Media Type that you are printing
too, IE: Velvet Fine Art Paper. Click on the Advanced
Settings button and select 1440 pr 2880 dpi for best
quality. Leave MicroWeave and Finest
Detail (checked) and High Speed
(unchecked).
The Media
Type is especially important as this will determine in part
how much ink is laid out on the paper. |
|
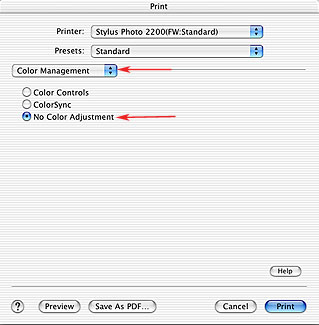
Step
5: Turn
the printers color management control off.
Select
Color Management from the pull down menu
on the left. Click on the No Color Adjustment button.
This will turn off the print drivers internal color management
control which is what we want. We want to control color via
our ICC Color Managed
workflow, the drivers attempt to manage color is not part
of this workflow and if on tends to create problems.
|
|
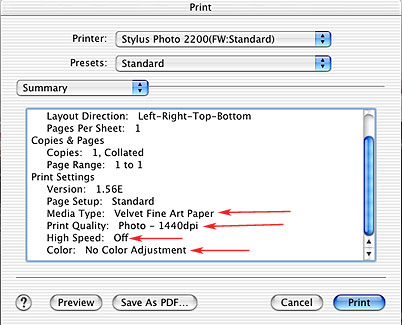
Step
6: Summary
of printer settings...
Select
Summary from the pull down menu on the left.
Look over the Print Settings and make sure
that they are set correctly before making your print. This
is just a good way to double check your settings before printing
your target file.
|
 |
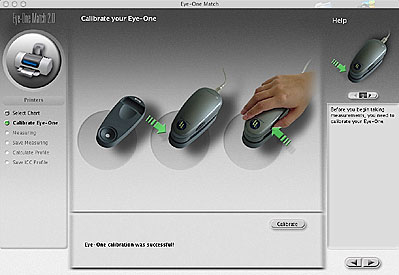
Step
7: Calibrate
the Eye-One Spectrophotometer.
Calibrating
the Eye-One spectrophotometer before reading color patches
ensures accurate data. Calibration
brings the device back to a known state. The Eye-One includes
a white calibration target on it's stand/holder. It is specific
to the SN# of the spectrophotometer.
|
 |
|
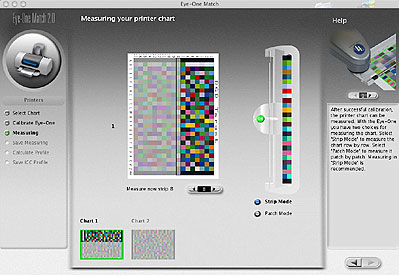
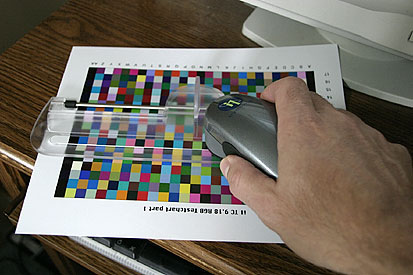
Step
8: Measure
patches..
You will
now measure all of the patches on the test target that you
printed. You have the option to read the patches one at a
time (very slow) or in strip mode. In this example we are
reading in strip mode. With the help of a plastic guide each
row is measured individually. The Eye-One is activated by
pressing the right hand button on the unit and slowly moving
over each row. Any errors will be noted and rows or patches
can be read again. |
|
|
Step
8 continued...
Here's
an image that clearly shows how the rows of patches are read.
Remember move slowly from start to finish, the software will
note any errors it encounters.
|
|
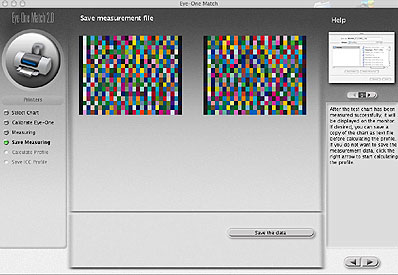
Step
9: Save
measured file.
Once
all of the patches have been successfully read, a measured
data (text) file can be saved. This text file can be opened
later and used to build a custom ICC printer profile or you
can skip this step and proceed directly to building your profile.
|
|
|
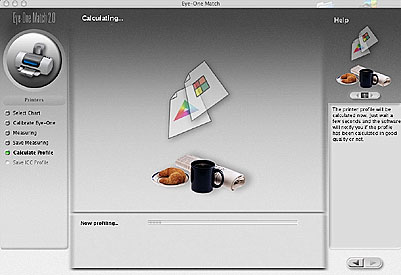
Step
10: Calculate
profile.
The software
will use the measured reading from your test target to create
a custom ICC printer profile. This profile represents the
color printing characteristics of your printer, ink and paper
set-up. A custom profile should be created for each printer,
ink and paper combination you plan to use.
This
is a processor intensive task and may take a few minutes.
|
|
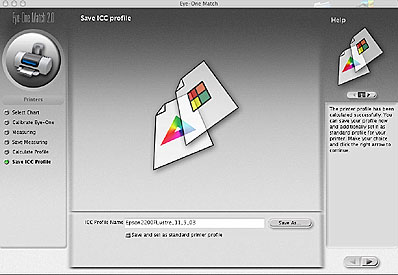
Step
11: Save
ICC profile.
This
is the last step in the printer profiling process. Save your
new profile with a name that makes sense. It is helpful to
include the printer name, ink and paper type in your description
along with the current date. This file will be placed in the
ColorSync folder within your operating system and is now ready
for use.
|
|
OK, you've
completed all but one module. You're well on your way to understanding
how to use and implement an ICC color workflow. Before you proceed
however please go through the following review questions to test
your knowledge.
Review
Questions: click
on the correct answer
1) The printer
target should always be printed with the default settings in your
print driver.
2) Even though
an Epson Ink Jet printer uses CMYK inks for printing it is best
to profile it as an RGB device with most profiling software packages.
3) You should
always profile your device (spectrophotometer) before any readings
are made from the printed target file.
4) ICC is an
abbreviation for the International Calibration Consortium.
5) Once you
create a custom profile with a particular printer, ink and paper
combination, in general you should not have to create another profile
for this set-up.
Great job...
your now ready to move on to the last module in this tutorial "Color
Management and Adobe Photoshop".
______________________________________________________________________________________________________
|
